Genius POS Setup Guide
Installer guide: enable NextGen, connect hardware, and finish configuration for XC23 terminals.
Overview
This guide describes how to configure a Genius location to use the NextGen POS solution, running on XC23 payment devices. It includes procedures for configuring the NextGen point-of-sale terminal, the customer facing display (CFD), and various card readers and printers.
Enabling a Location to Use NextGen POS
Before a location can use the Genius POS, you must enable the location to use it in the Admin Console.
- Log into the Admin Console, and access the appropriate account and location.
- In the Admin Console's Main Menu, click Location Setup.
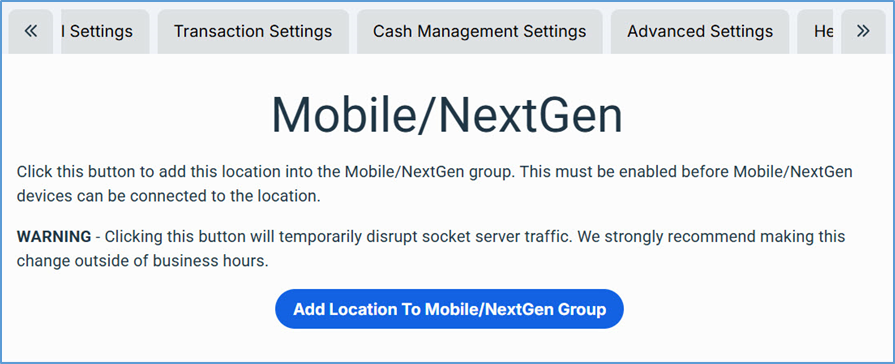
- In the Location Settings screen, click the Mobile/NextGen Settings tab.
- In the Mobile/NextGen Settings tab, click Add Location to Mobile/NextGen Group.
Connecting the CFD Device to the NextGen Device
- Turn the CFD device over and unspool its power cable.
- The power cable uses a USB-C connection.
- On the back side of the NextGen device, slide the back panel off.
- This will reveal a USB-C printer port labeled CFD.
- Plug the CFD's power cable into the CFD printer port.
- Replace the back panel, threading the CFD cable through the panel's access hole.
- Power on the NextGen device, and log into the POS.
Connecting the Receipt Printer
- Facing the back of the receipt printer, turn the device upside down.
- Under the printer, along its back side, you will find a collection of ports, including an Ethernet port, a USB-B port, and a USB-A port. You will also find the port for the device's power cable.
- Find the device's data cable. It features a USB-B connector on one end and a USB-A connector on the other end.
- Plug the USB-B end of the data cable into the printer's USB-B port.
- Plug the device's power cable into the AC port.
- Thread both cables through one of the access holes in the printer's casing.
- Facing the front of the printer, push back the right-hand lever along the top and open the paper feed.
- Insert the paper roll, unrolling it from the bottom out over the front of the device.
- Close the paper lid until it snaps shut.
- Turn on the printer by flipping its power switch.
The receipt printer is now functional. You can log into the POS and associate the printer with a printer template (see the "Printer Templates" section below).
Connecting the Verifone T650 Device
The following procedures describe how to connect a Verifone T650 payment device to a NextGen POS terminal.
Attaching the Verifone Power Cable
- Turn the Verifone device upside down.
- On the underside, press the lock button and slide off its bottom panel.
- Removing the panel reveals connection ports (two Ethernet, one USB-A, one USB-C).
- Plug the device's power cable into the AC port.
- Thread the power cable through the access slots near the top of the device.
- Slide the bottom panel back into place until it snaps shut.
Connecting the Verifone to Wi-Fi
- Turn on the Verifone device (press and hold the Power button along the left edge).
- Allow the device a few minutes to load and run the necessary apps.
- Once the Payments app is running, tap the Home button.
- Swipe down from the top of the screen.
- In the top panel, press and hold the Wi-Fi icon.
- Select the location's Wi-Fi network.
- When prompted, enter the Wi-Fi password, then tap Connect.
Setting a Static IP Address via Ethernet
- In the Home screen, swipe up from the bottom of the screen.
- In the Apps screen, tap Settings.
- Tap Network and Internet, then Advanced Options.
- Set the Ethernet setting to Static.
- Enter the necessary network settings:
- IP Address — address of the device on the network
- Gateway ID — router's default gateway address
- Network Prefix Length — default is 24
- DNS 1 — default is 8.8.8.8
- DNS 2 — default is 8.8.4.4
- After entering the necessary network settings, tap Save.
Configuring the NextGen Device
After connecting all hardware peripherals, follow these steps to power up the NextGen device, connect to Wi-Fi, and launch the POS.
Powering Up the Device
Press and hold the Power button (on the underside of the screen). Once the NextGen device powers up, it will display its Home screen.
Connecting to the Location's Wi-Fi Network
- Access the XC23 Home screen.
- Tap the Settings icon.
- In the Settings screen, tap Network & internet.
- Tap Wi-Fi.
- Select the network the device will use. Enter the password when prompted, then tap Connect.
Running the Genius POS
- Access the XC23 Home screen by tapping the Home button in the bottom panel.
- In the Home screen, tap the Genius icon. The POS app will display a prompt for a Device Login Code.
- Enter a valid Device Login Code, then tap Confirm.
- After submitting a login code, the POS will prompt you to specify how the device will be used. Tap Permanent.
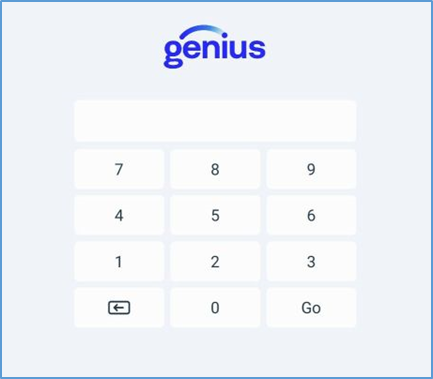
- The POS app will display the location's PIN screen. Enter a valid PIN, then tap Go.
Setting a Printer Template for the Device

- In the POS PIN screen, log into the POS.
- In the Rooms screen, tap the Options button.
- In the Options menu, tap Settings, then Printers.
- In the Printers screen, tap New Template.
- In the Template Name box, enter an appropriate name for the new printer template.
- In the Rooms area, select each room that will use the printer on this device.
- Scroll down and review the available printers.
- For each printer this device will use, tap Enable in the printer's tile.
- For each kitchen printer you enable, select the applicable display formats in the Default printer for formats area.
- For each printer you enable, select the display formats that will use this printer as backup in the Backup printer for formats area.
- To send a test print, tap Send Test in the printer's tile.
- Tap Save to save the template.
- After saving, select an appropriate printer tile for the template, then tap Use.
- Tap Exit to return to the Ticket screen.
Configuration for Gift Card
If the location offers gift card service, you must configure the location to process gift card transactions in the Admin Console.

- In the Admin Console, access the appropriate location.
- In the Main Menu, click Location Setup, then Payment Gateway.
- In the Payment Gateway screen, on the In-Store Settings tab, select Genius in the Gift Card list.
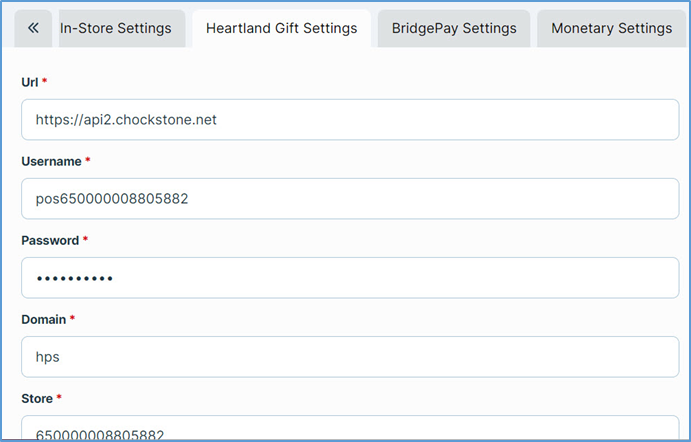
- Click the Gift Settings tab.
- Enter the necessary credentials: URL, Username, Password, Domain, and Store ID.
- Click Save to save your settings.
Configuration for Portico Direct
If the location uses the Portico service, you must configure the location in the Admin Console.
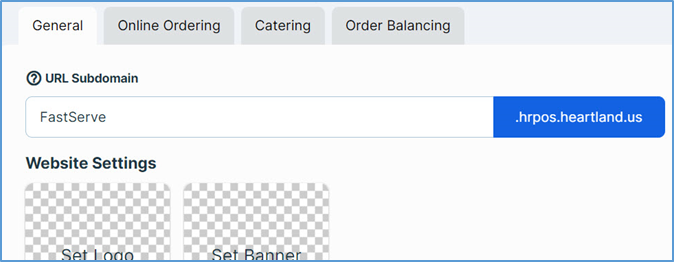
- In the Main Menu, click Location Setup, then Online Ordering.
- On the General tab, verify that Online Ordering is enabled and a subdomain is entered.
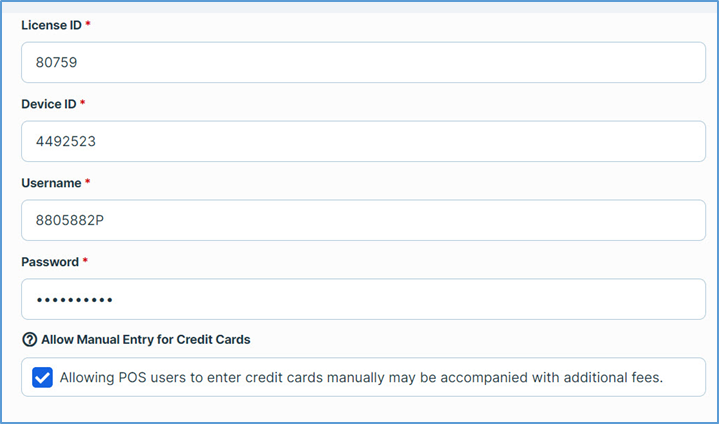
- In the Main Menu, click Payment Gateway.
- On the In-Store Settings tab, select Allow manual entry for credit cards.
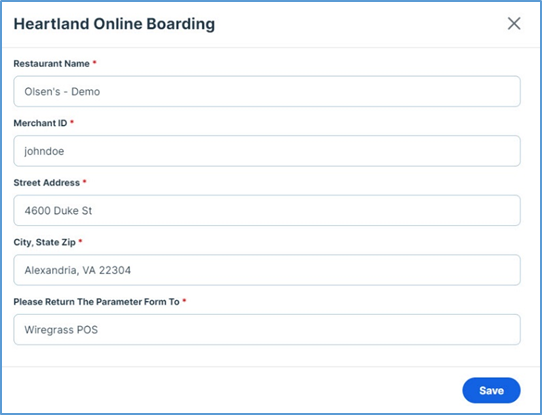
- Click the Online Settings tab. The program will display the Online Boarding Panel.
- In the panel, enter the required credentials: Restaurant Name, Merchant ID, Street Address, City/State/ZIP, and dealership return info.
- Click Save.
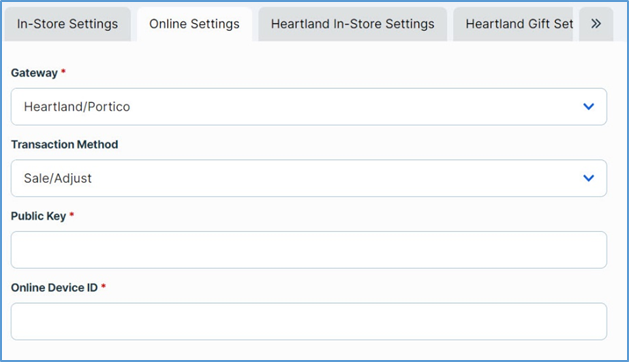
- After the panel closes, enter the remaining credentials in the Online Settings tab.
- Click Save to save your settings.
Configuration for Credit Surcharges
The following section describes how to configure a Genius location to apply surcharges to credit card orders processed with Genius EMV, in accordance with the Credit Surcharge Program. These procedures assume you have already configured the location's payment gateway and EMV solution.
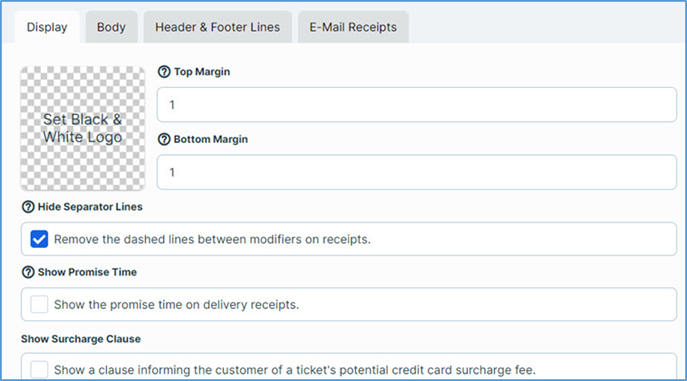
- In the Main Menu, click Location Setup, then Customer Receipt.
- In the Customer Receipt screen, select Show Surcharge Clause.
- When selected, the Credit Surcharge Amount box appears below.
- If necessary, enter the accurate surcharge percentage (default is 3%).
- Click Save.
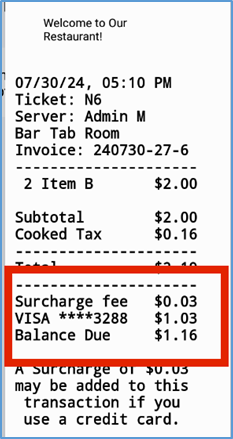
The POS will include a message on printed customer receipts alerting customers that a surcharge may be added if they pay with a credit card.
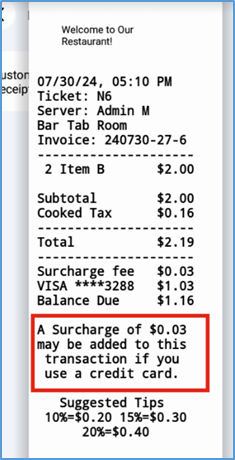
If a customer pays with a credit card, the POS includes the surcharge amount, clearly labeled as "Surcharge fee", in the printed receipt.